How to Verify Sodium Extra Works With Your Minecraft Launcher
Ensuring your optimization tools are active in 2026 is the secret to a high-performance Minecraft experience. Many players download mods but forget to check if they are actually running, missing out on massive FPS gains.
This guide focuses on precise verification steps to confirm your rendering engine is fully operational within your launcher. We will explore visual cues and debug menus that provide definitive proof of a successful installation.
By following this tutorial, you will confidently navigate your video settings to ensure every tweak is working perfectly. Let’s get your game verified so you can stop worrying about lag and start enjoying a smooth world!
What are the Visual Indicators of a Working Installation?
The most obvious sign that your optimization is active is the change in your “Video Settings” screen. Instead of a basic list, you should see a modern, tabbed interface that looks clean and professional.
If you see tabs like “Performance” or “Extra,” then you know the renderer is communicating perfectly. These menus only appear when the mod is successfully loaded into the game’s active memory.
Spotting the Transformation of the Video Settings Menu
When the mod is active, the buttons for graphics and render distance will look different from the vanilla game. This visual shift is a green light that your launcher successfully pushed the files.
Confirming the Presence of the “Extra” Tab and Sub-Menus
Look specifically for the “Extra” tab, which contains toggles for animations and particles. If this tab is missing while others are there, it means the base mod works, but the add-on is not active.
| Navigation | Simple Vertical List | Modern Tabbed Layout |
| Animation Control | All or Nothing | Individual Toggle Buttons |
| Particle Detail | Three Basic Levels | Granular Percentage Control |
| GUI Style | Standard Text | High-Definition Icons |
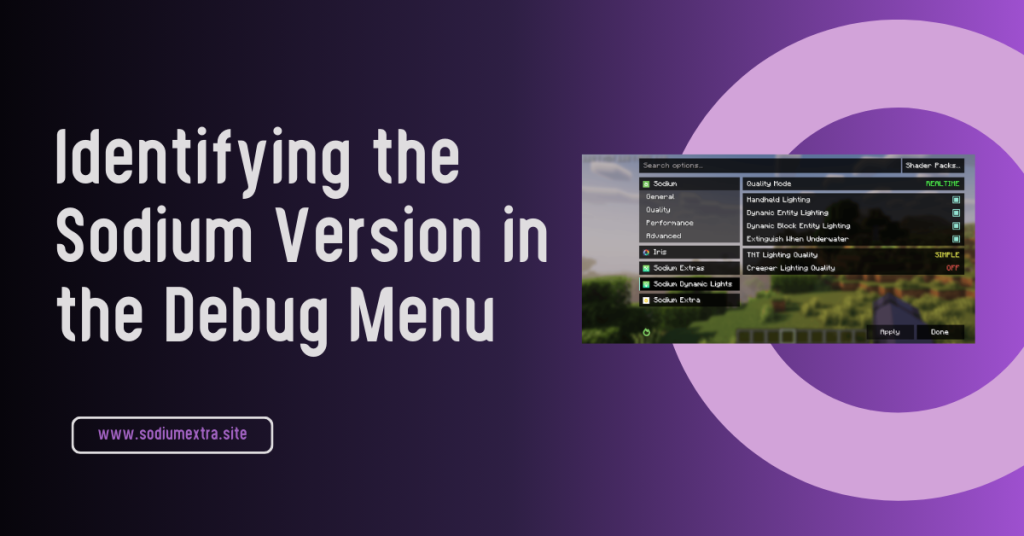
Identifying the Sodium Version in the Debug Menu
Using the game’s internal tools is the fastest way to see if the software is running on your card. It bypasses the menu visuals and shows you exactly what the engine is using to draw the world.
If you see the mod’s name listed in the technical data, you can be 100% sure it is active. This data is pulled directly from the PC’s active RAM while the game is running.
Crucial Steps for Reading the F3 Overlay Information
- Launch Minecraft and wait for all chunks to finish loading.
- Press the F3 key on your keyboard to open the detailed “Debug” overlay screen.
- Look at the top-left corner where the game displays your software info.
- Search for a line that mentions the renderer’s name and version number.
- If the name appears next to your GPU info, the engine is active and rendering.
Verifying GPU Acceleration and Vendor Recognition
The debug screen also confirms that the game correctly recognizes your graphics card. A successful mod load ensures the engine communicates with your GPU for the best frame rates.
The Log File Check: Searching for Mod Initialization Success
If your game looks the same but you still feel lag, it is time to check the background logs. These text files record every action the launcher takes when it tries to start the game.
By searching these logs, you can find the exact moment the mod was loaded or if it failed. This is a pro-level move that clears up any mystery about whether your software is truly running.
Finding the Latest Log in Your Launcher Directory
Open your launcher settings and click “Open Folder” to find your game files. Look for the “logs” folder and open the file named “latest.log” with a basic text program.
Scanning for Error Codes or Successful Load Messages
Use the search tool (Ctrl+F) and type in the name of your mod to find it. Look for a line that says “Loading mod” followed by a “Successfully initialized” message.
Launcher Analysis: Common Compatibility for Rendering Mods
| Vanilla Launcher | Moderate | Manual Pathing | High |
| Prism Launcher | Very High | One-Click View | Extremely High |
| CurseForge App | High | Folder Shortcut | Moderate |
Performance Testing: Measuring Real-World FPS Improvements
Verifying the code is great, but seeing the frame rate go up is what really matters. You should do a quick test by standing in a busy area to see how your frames look.
A successful installation should show a significant jump, often doubling your previous numbers. If your FPS remains the same, the mod might be loaded but not correctly configured.
Baseline Testing in High-Entity Survival Areas
Go to a place with lots of animals or machines to see how the renderer handles stress. A working mod will keep your game smooth even when there is a lot of action.
Comparing Frame-Time Stability with the New Renderer
Look at the “Frame-Time” graph in the debug menu to see if lines are flat and steady. A verified installation makes these lines smoother, meaning you won’t feel any annoying micro-stutters.
Troubleshooting Steps for Missing Menus and Interface Glitches
If the files are in the folder but you don’t see menus, you might have a mod conflict. Sometimes two mods try to change the same menu, and one gets hidden from view.
Another reason for missing menus is using an old version of the “Fabric API” by mistake. Always make sure your library files match the version of the game you are playing.
Actionable Checklist for Fixing Invisible Verification Menus
- Delete the “config” folder in your instance, then restart the game to reset the UI.
- Ensure you are not running “OptiFine” at the same time, as it blocks the new renderer.
- Update your graphics drivers to the latest version to support the new code.
- Verify that the “Reese’s Sodium Options” mod is present to handle the layout.
- Restart your entire computer to clear the memory and ensure a fresh start.
Resolving Library Conflicts Between Different Rendering APIs
If you have multiple rendering mods, they might fight for control of your hardware. Removing the ones you don’t need ensures that your main mod can work without any interference.
Conclusion
Verifying that your performance tools are actually doing the Sodium Extra work required is the final and most important step in your optimization journey. By checking your debug menus and exploring the new video settings, you ensure that your hardware is actually benefiting from the files you installed. This process turns a “maybe” into a “definitely,” giving you the peace of mind that your game is running at its absolute best.
Remember that log files are your best friend when things don’t look right, as they hold the secret to every loading error. With a verified and active setup, you can finally dive into your favorite worlds without the fear of sudden lag spikes because you know the Sodium Extra work is being handled correctly in the background.
You have now mastered the art of Minecraft performance verification, making you a pro at troubleshooting your own game. Keep your drivers updated, stay organized, and enjoy the incredibly smooth gameplay that only a perfectly verified setup can provide!
Frequently Asked Questions (FAQ)
How do I know if Sodium Extra is actually doing something?
The best way is to check the “Extra” tab in your video settings and toggle off some animations. If you see the animations stop in-game, then it is working perfectly for you.
Why don’t I see the Sodium name in the F3 menu?
If it is missing from F3, the mod likely didn’t load. Check your “mods” folder to ensure you have both the base renderer and the “Extra” add-on files.
Can a launcher update break my verification?
Yes, sometimes a launcher update can reset your “Profile” settings. If your game feels slow again, double-check that you are still launching with the “Fabric” profile selected.
Does verification work the same on macOS and Linux?
Absolutely! The F3 menu and the video settings interface are identical across all operating systems. The only difference is how you find your “logs” folder in the system.
What if my FPS is still low after verification?
If the mod is verified as “Active” but FPS is low, check your “Render Distance.” Even the best mods can’t help if you load too many chunks for your hardware.
Is there a way to verify without entering a world?
You can check the “Logs” while the game is still on the main menu. If the log shows the mod initialized, it is active and ready to go.
Why do my menus look like the old vanilla ones?
This happens if you are missing the “Options API” mod. While the performance boost might still be active, you won’t get the nice new menu without that specific file.
Will my shaders show up in the verification menu?
If you have the “Iris” mod installed, you will see a “Shaders” tab next to the other tabs. This is a great way to verify your entire graphical stack.
Latest Posts: